Animating the Light Streaks: Animating with ImageReady
Now that we have the frames created, we're ready to switch to ImageReady to start the animating process.
Step 15
Send the document to ImageReay (File> Edit in ImageReady or Shift+Ctrl+M).
You may also press the Photoshop to ImageReady button in the toolbox.
Step 16
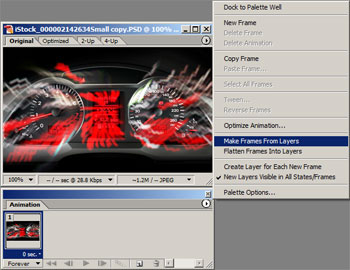
Open the Animation pallet (Window> Animation). Click the flyout menu on the top right corner and select "Make Frames From Layers". Your animation pallet should now contain frames created from the layers.
Step 17
Save the image. To save the image as an animated GIF file, change the Format in the Optimize pallet (Window> Optimize) to GIF and adjust the settings. Because the animation I created will be used on the web, I used the following properties:
Format: GIF
Colors: 64
Dither Method: None
Use the "Save Optimize As" tool (File> Save Optimized As) to save the image.
Format: GIF
Colors: 64
Dither Method: None
Use the "Save Optimize As" tool (File> Save Optimized As) to save the image.


0 comments:
Posting Komentar